Transfer Photos from iPhone to PC
If you have a PC with an older version of Windows, Auto Play will pop-up when your iPhone is connected to your computer with a USB cable. On a PC with Windows 8, your computer will detect the device and provide a pop-up that says, Tap to choose what happens to this device. When you click on that pop-up, you’ll see the option to Import Photos and Videos. The rest of the process should be pretty similar to what is below. When in doubt, look for the Import button.
We’re going to focus on getting photos onto your computer with Windows 10. Like the Mac, Windows has a Photos app for easy import and organization.
Plug your iPhone into your computer with the USB cable.
The Photos app should automatically launch. If it doesn’t, launch the program using the Windows Start menu or search bar.
Click the Import icon in the upper right corner of the Photos app.

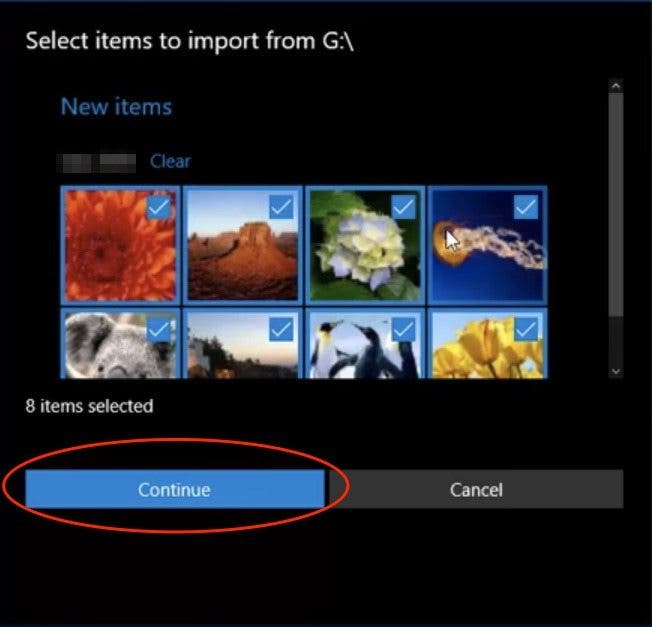
A box with the new photos for transfer will pop-up. Select the photos you want to import and tap Continue.
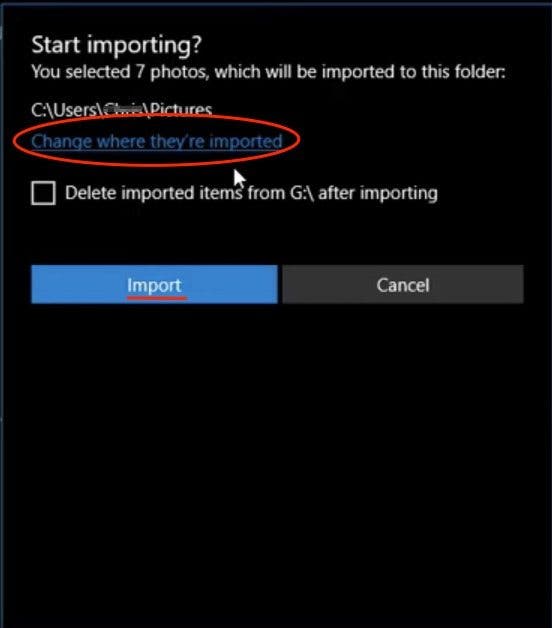
The next pop-up will show you where the photos will be saved and give you the option to change the location. Here, you can also check the box, Delete imported items from (device) after importing.
Click Import.
Once they’re imported, you can view the photos in the Collections menu or select the Album icon on the left sidebar to view specific albums.
We’re going to delve into the two different way to transfer photos with iCloud next: Photo Stream and iCloud Photo Library. There are some important distinctions between the two that we’ll go over; my best recommendation is to enable both.